
The bulb socket is an important component that provides the final electrical connection with the light bulb. Like all other electrical parts, the bulb socket is prone to wear over time. A poor connection can cause the socket to overheat or short out. If a light bulb in a particular socket needs to be replaced often, that indicates either internal power surges or a faulty bulb socket.
If done correctly, changing a light socket is a snap. It’s as simple as:
- Disconnecting the light fixture shade
- Removing the old light socket
- Connecting the wires to the new socket
- Replacing the fixture
This project involves working with electricity. If you feel uncomfortable working with electricity, consider calling a certified electrician.
Whether you are installing a new light socket, light fixture, or an old ceramic light socket, here are the tools and steps you need to know:
10 Steps for How to Install a Light Bulb Socket
1. Gather Tools and Materials
Replacing a light bulb socket requires some basic electrician’s tools, including:
- Screwdrivers
- Pliers
- Step ladder (if you’re working at height)
- Safety glasses
- Replacement bulb socket
- Wire strippers
- Extra wire nuts
- Non-contact voltage tester
- Work light
2. Prepare to Work
Carefully place a step ladder under the light socket or fixture. If someone is available to help, ask him or her to secure the ladder or stand by as you use it. They can also provide you with tools and parts as needed. Put on a pair of safety glasses to prevent dust and debris from getting into your eyes.
3. Cut the Power
Locate the circuit breaker serving the area where the fixture is and switch it off. The breaker should be labeled, making the right one easy to find. Then, turn on the light switch to confirm the power is off.
4. Remove the Bulb & Test the Socket
Before you can test the socket, you need to remove the light bulb. Simply twist the bulb counterclockwise to unscrew it. Once you’ve unscrewed the light bulb (and loosen/lower the fixture if necessary), check for power with the voltage tester. Turn the selector switch to 250 ACV and then touch the red wire leading to the center metal tab.
Then, touch the black wire to the metal threaded side of the socket. If no electricity is present, the meter will not provide a reading. Do the same after flipping the light switch as well.
5. Remove the Decorative Fixture
If the fixture has a decorative feature, such as a globe or shade, unscrew or unfasten the connections and remove the piece. Some fixtures have thumbscrews, internal clips, or retainer nuts, and depending on the unit, you may need a screwdriver.
For a larger element like a globe, hold it in one hand while loosening any fasteners. Once it is unfastened, it will drop if your hand isn’t supporting it. If it doesn’t pop out of place after being unfastened, it may be stuck to the paint. Use a utility knife to carefully cut around the fixture to release it from the ceiling.
6. Inspect the Connections & Remove the Socket
Examine the connections to see how the fixture is attached and determine the condition of the wiring. Label each wire according to where it connects. Turn any wire nuts counterclockwise and remove them from each set of wires. You can then separate the wires and disconnect the ground wire. Then, unscrew the screw retaining the socket and remove the bulb socket.
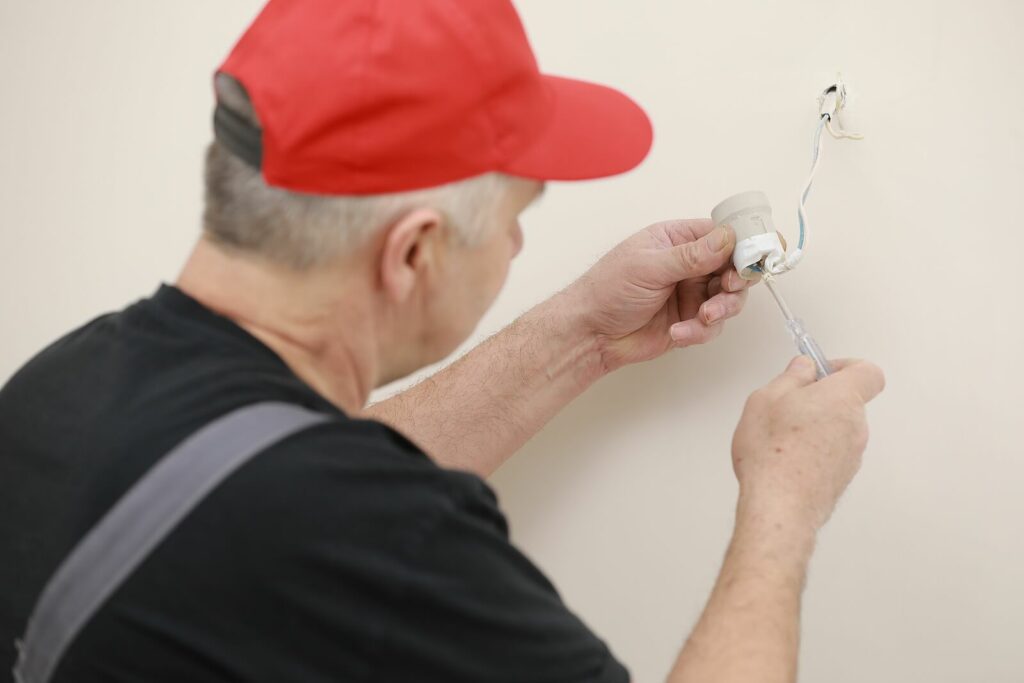
7. Connect the Socket Wires
Light fixtures have a white neutral wire, black current wire, and copper ground wire. Determine whether the wires wrap around screws or if wire nuts are needed for the fixture. Remove about three fourths of an inch of wire sheathing with a wire stripper and bend the exposed wire into a U-shape. Then, wrap it around the corresponding screw (also colored for the appropriate wire), crimp the wire, and use a screwdriver to tighten the screw.
If wires need to be attached to wires, make sure to connect like-colored ones before twisting the wire nut over them. Gently fold the wires back into the junction box.
8. Screw in the Socket
Line up the screw holes of the socket base with those of the electrical box. Insert the screws one at a time and tighten them clockwise.
9. Insert & Test the Light Bulb
Place the light bulb back into the socket and turn it clockwise until it is secure. Once the bulb is in place, turn on the circuit breaker and light switch to test the light socket. If it doesn’t work, there’s likely a loose connection, so check for loose wires or that you have the right bulb. If everything works, clean and re-install any decorative components.
10. Replace the Decorative Feature
If you removed any decorative feature like a globe or shade, replace it now. Carefully move it back into position, and fasten the thumbscrews, internal clips, retainer nuts, or screws, depending on the fixture.
Need help installing a new lighting fixture? Black Hills offers expert indoor and outdoor light installation and repair services in Olympia, Washington. Contact us online to schedule an appointment, and our certified electricians will help you fix or repair any electrical problems you have.